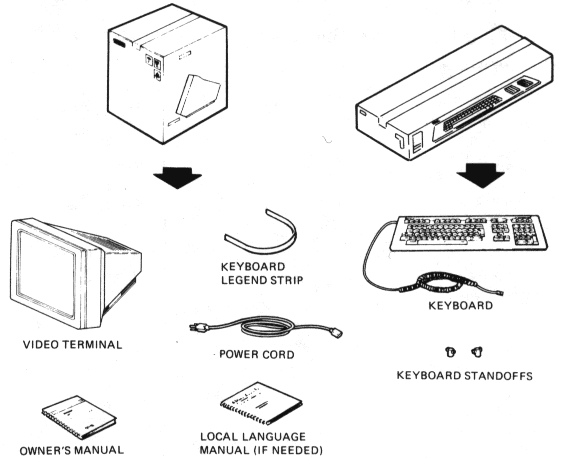
This chapter provides step-by-step instructions to install and turn on your terminal. Perform each step in order.
Unpack and check the contents of each carton.
If you have missing or damaged items, contact your sales representative and delivery agent.
Place the terminal on a level surface.
If you have the optional tilt-swivel base, install it now. The base comes with installation instructions. To order the base, see Appendix B.
Install the keyboard's legend strip and standoffs.
To install the legend strip, slide it under the tabs.
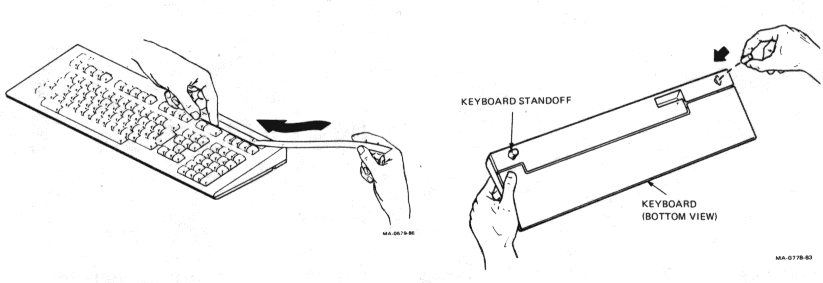
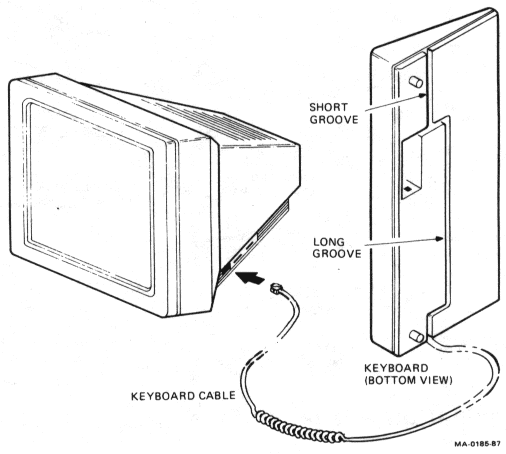
Connect the keyboard to the video terminal.
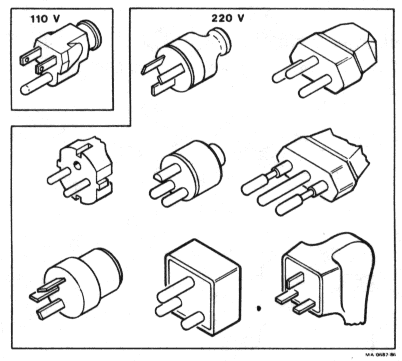
Match the power cord to your wall outlet.
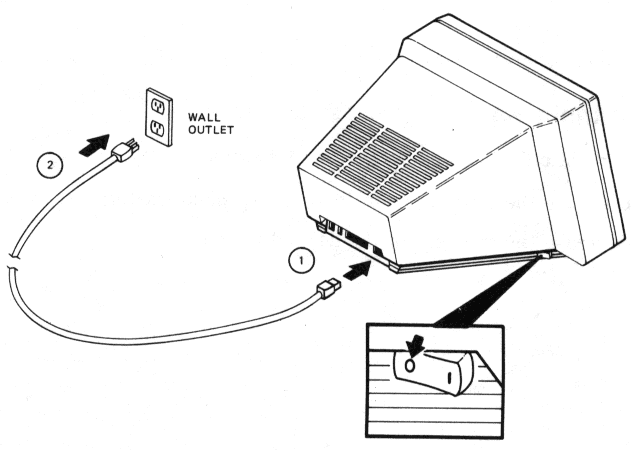
Make sure the power switch is off (0). Then plug the power cord into the terminal and into the wall outlet.
Turn on your terminal.
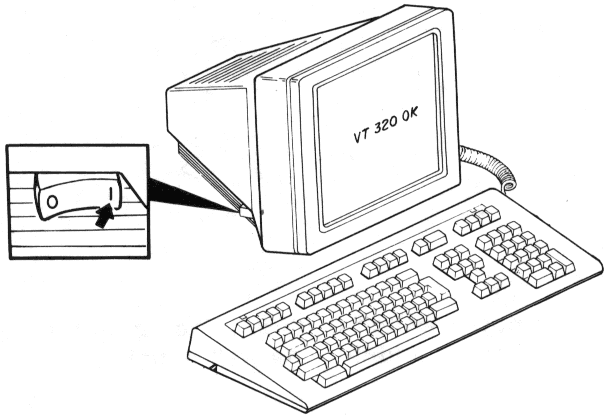
NOTE: If you had problems, see "Operating Problems" in Chapter 7.
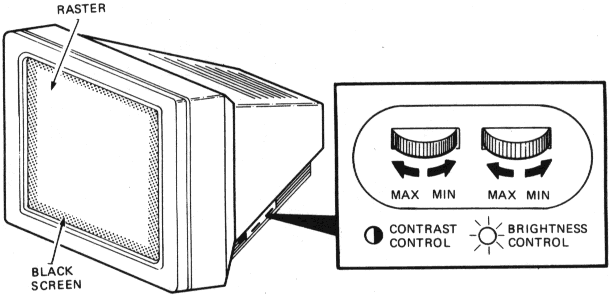
Set the brightness and contrast controls.
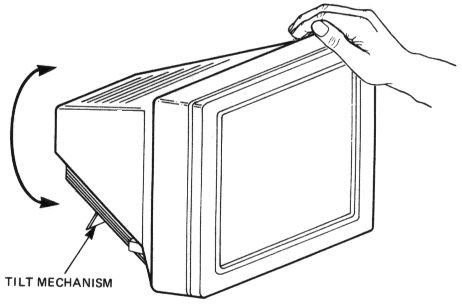
Adjust the viewing angle.
Grasp the terminal and raise the rear, until the screen is at the desired viewing angle.
Connect the system cable and printer cable (if used).
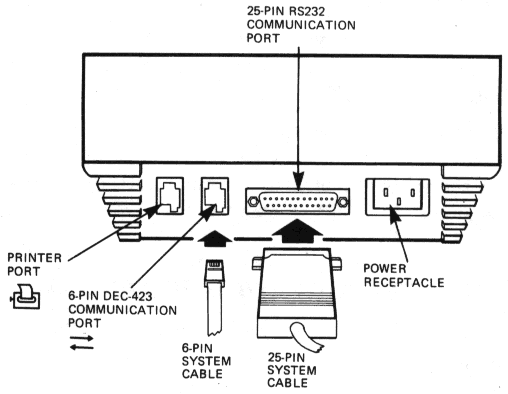
You connect your system cable to one of the two communication ports on the rear of the terminal -- the 25-pin RS232 connector or the 6-pin DEC-423 connector. Check your system cable to see whether you have a 25-pin plug or a 6-pin jack.
Only one communication port is active at a time. By default, the 25-pin RS232 port is active.
If you use a 25-pin system cable: Simply plug the cable in. Then go on to the next section, "Selecting the Correct Keyboard Language".
If you use a 6-pin system cable: You must set the Host Port Selection feature in the Communications Set-Up screen to "DEC-423, Data Leads Only", as follows.
NOTE: Chapter 4 shows each set-up screen.
 key to move the cursor to "Comm". Press the Enter
key to display the Communications Set-Up screen.
key to move the cursor to "Comm". Press the Enter
key to display the Communications Set-Up screen.After you connect the system cable, the terminal is ready for use with your host system. If your terminal fails to operate, see "Operating Problems" in Chapter 7.
You must select the appropriate keyboard language from the Set-Up Directory screen, as follows.
NOTE: Chapter 4 shows each set-up screen.
The VT320 is initially set to a baud rate of 9600. This setting works with most Digital systems. The baud rate setting must match the baud rate of your host system. If you need to change the setting, use the following steps.
NOTE: Chapter 4 shows each set-up screen.
key to move the cursor to "Comm". Press the Enter
key to display the Communications Set-Up screen.